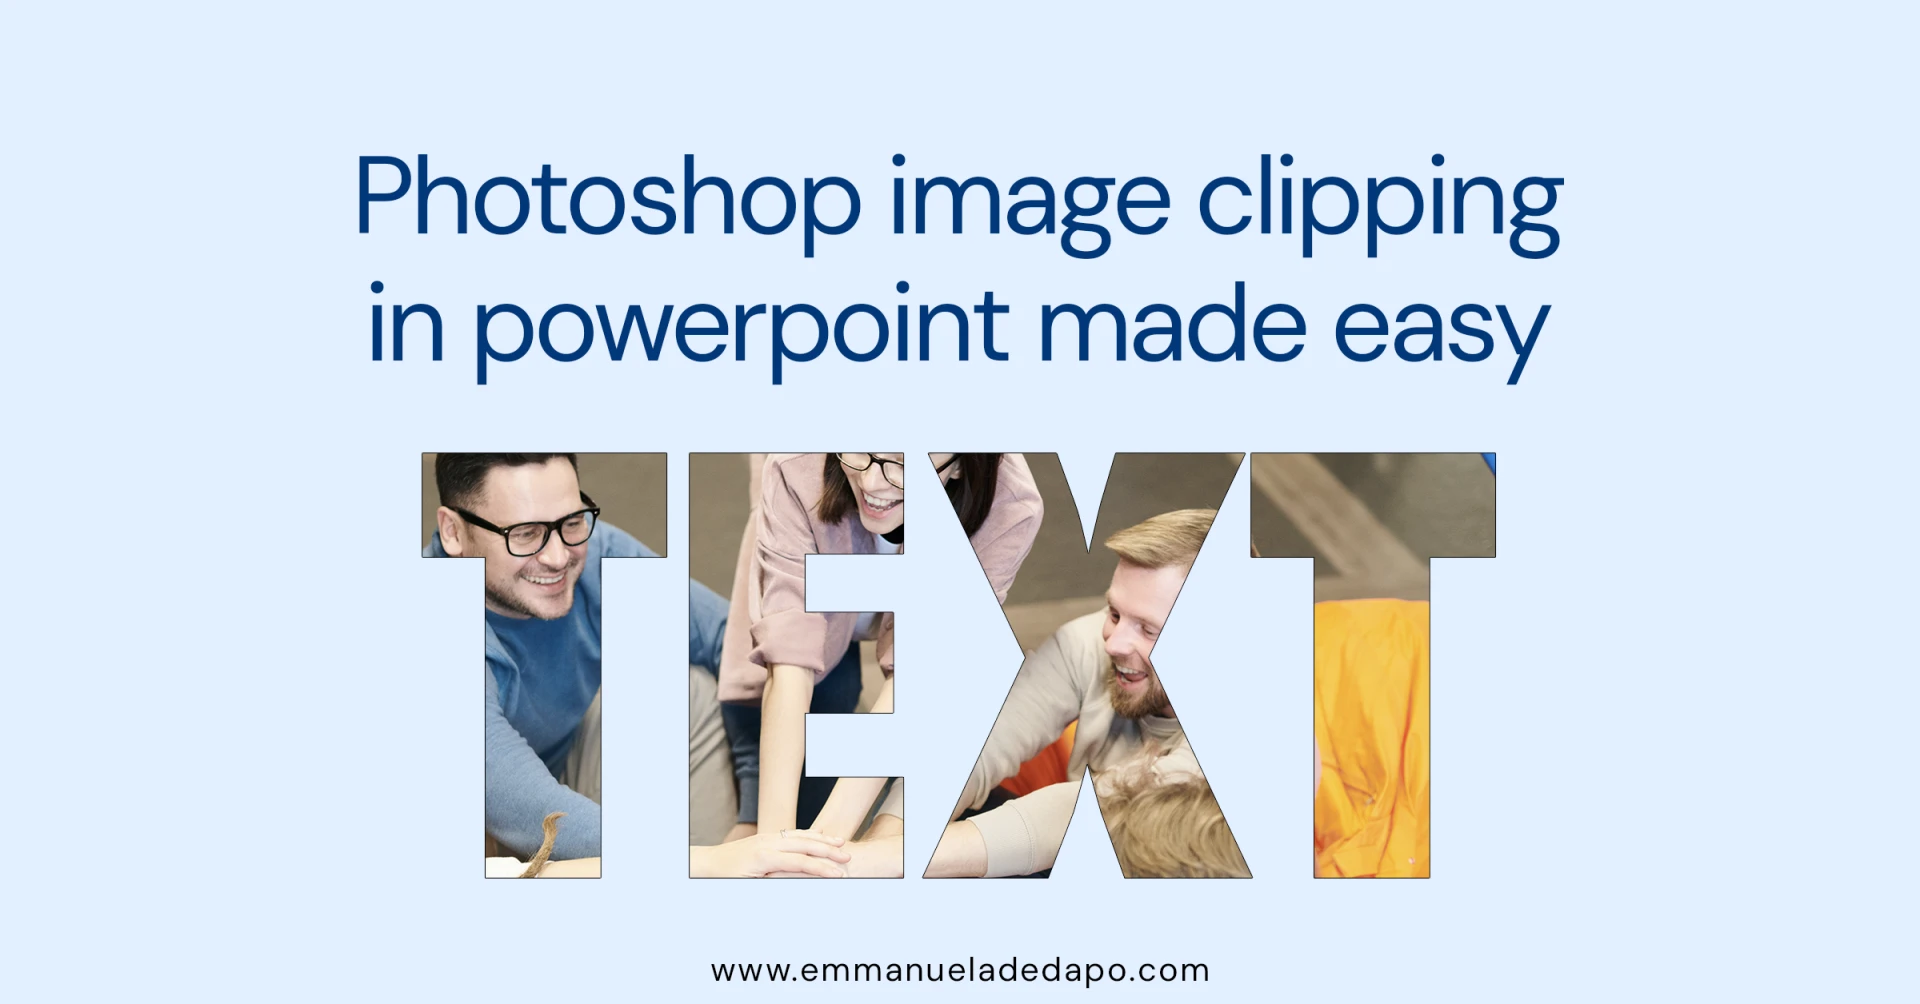
Ever wondered how this artistic element, as shown above, can be achieved in Microsoft PowerPoint? As someone who has been using Microsoft PowerPoint for years, you may find it impossible to recreate this if the right approach is not followed.
Microsoft PowerPoint has some features that seem hidden to a mere user; unless you explore this hidden part, you cannot see the beauty of this powerful presentation tool
You can easily put the image in text form by following these steps:
Firstly, you need to ensure you are using the latest PowerPoint (Office 365, 2019 or later version).
Step 1: Create the Text
Open PowerPoint and create a new textbox By going to the insert tab, look for shapes and select the icon with “Text Box” title

Step 2: Prepare Text box
Create the text box and type in your text, ncrease the font size, and change the font to a font that will be bold enough for legibility, after you are done, you have something like the below picture

Step 3: Convert the Text Characters to shape
In as much that the textbox itself is a shape, the characters are not in shape form, therefore, you cannot apply some attribute to it. It is until you change them. Draw a square shape over the text area, send the square shape backward until it is behind the text. It should look like the picture below

Step 4: Merge the Shapes
Highlight the two element, goto format tab, select Merge shapes and click on intersect. This should give you something similar to the below image

Step 5: Change background to Image
The Text element is how standard shape and you can chanage the background to either, color, gradient, or image, you will not ne able to edit the text again as it is now an Object. Ensure the text is having final styles before performing step 5.
